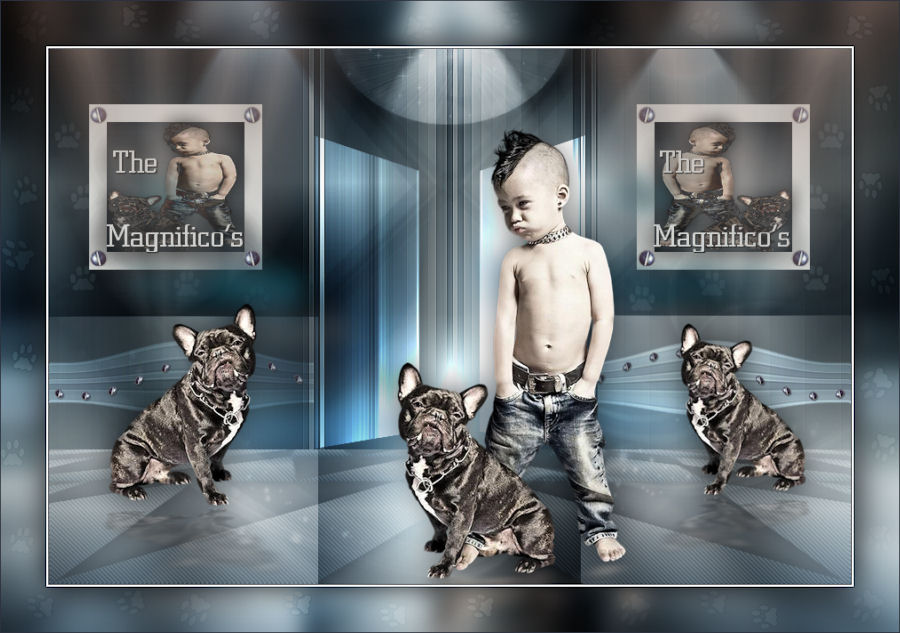
Text
Tool  - Same settings.
Type:
Magnifico's
Layers - Convert to Raster
Layer
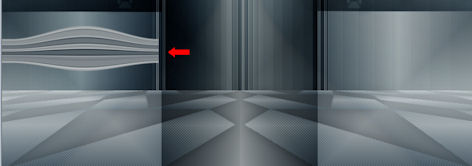
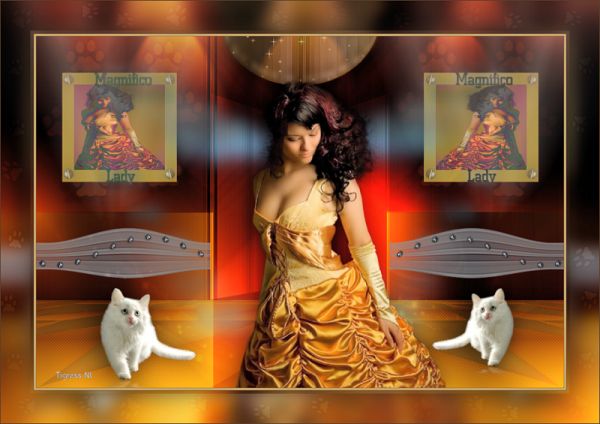
Move to the Left frame like
this:
Layers - Merge - Merge
Down
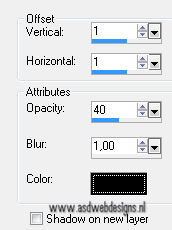
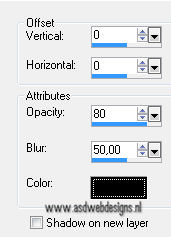
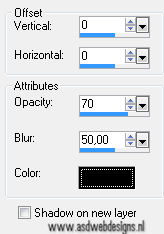
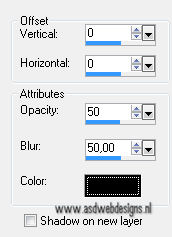
Effects 3D Effects -
DropShadow - Color: #000000 
Effects 3D Effects -
DropShadow - Color: #000000
Layers - Duplicate
Layer Palette - Click on the
original layer (Second from the top)
Effects -
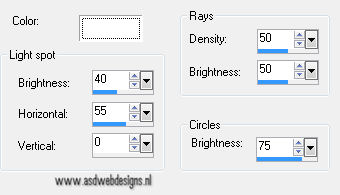
Plugins - Alien Skin Eye Candy 5 -
Impact - Backlight -
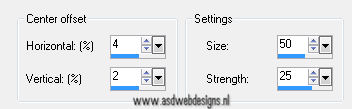
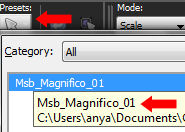
Settings Tab: Preset
Msb_Preset_BL_Magnifico_01
Layer Palette - Click on the top
layer
Layers - Duplicate
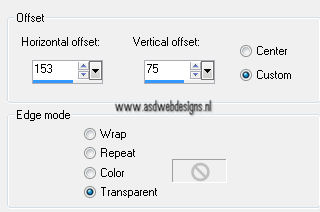
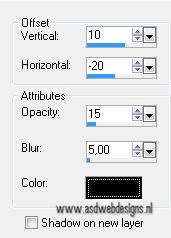
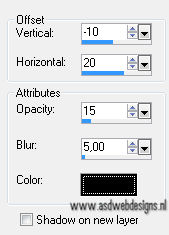
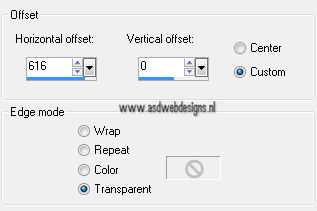
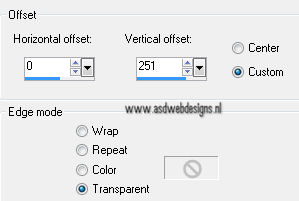
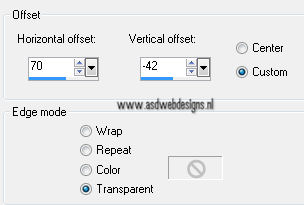
Effects - Image Effects -
Offset
Effects - Plugins -
Alien Skin Eye Candy 5 - Impact -
Backlight - Settings Tab:
Preset Msb_Preset_BL_Magnifico_02
Layers - Merge - Merge Down -
REPEAT 3 TIMES
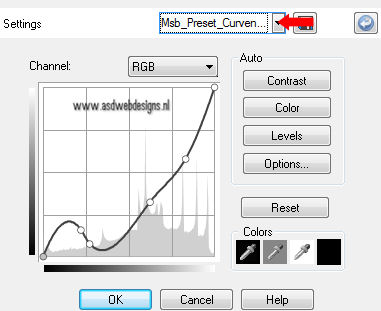
Adjust - Brightness and Contrast -
Brightness/Contrast - Curves - Preset
Msb_Preset_Curven_Magnifico_01
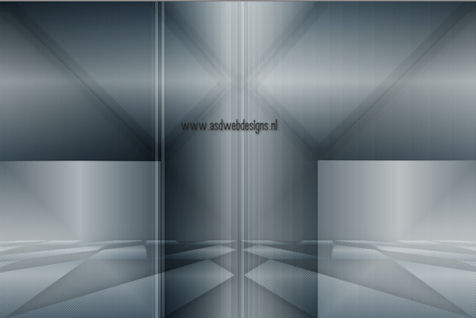
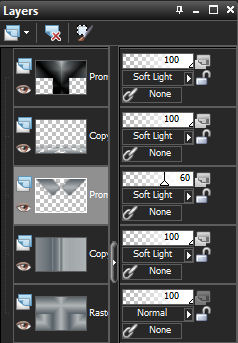
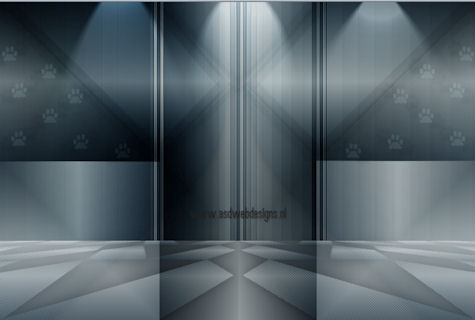
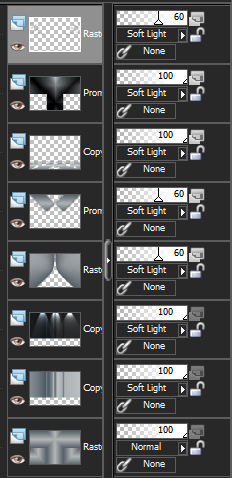
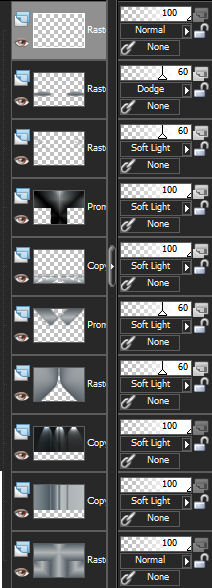
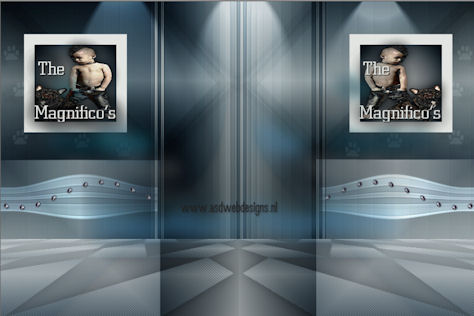
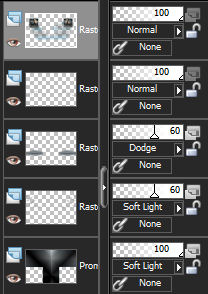
Your work looks and the top
5 layers of your Layer Palette look like this
now:
13.
Open Tube "Msb_schroeven"
Edit - Copy
On
your work image: Edit - Paste As New
Layer
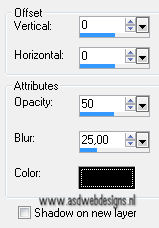
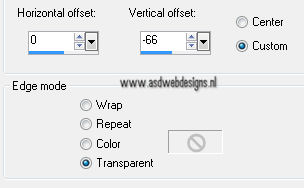
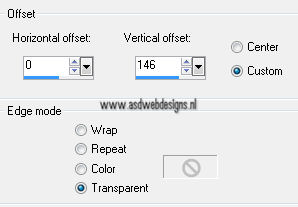
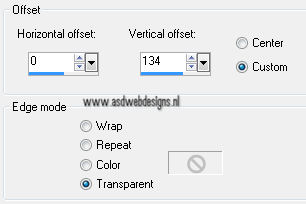
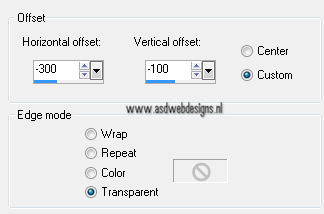
Effects - Image
Effects - Offset
Effects 3D Effects - DropShadow -
Color: #000000
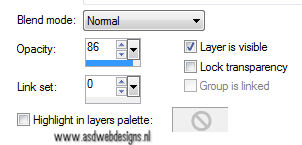
Layer Palette - Double
click on this Layer and set the
Layer Opacity of this layer to
86
Layers - Merge - Merge Down
14.
Open Tube "Msb_Deco_2"
Edit - Copy
On
your work image: Edit - Paste As New
Layer
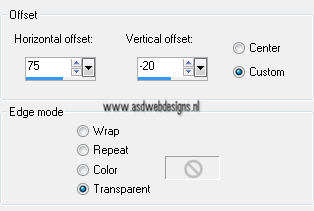
Effects - Image
Effects - Offset
Effects 3D Effects - DropShadow -
Color: #000000
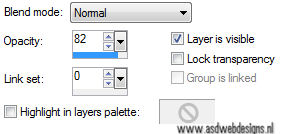
Layer Palette - Double
click on this Layer and set the
Layer Opacity of this layer to
82
15.
Color Palette: Change your
Foregroundcolor to #ffffff 
Layers - New Raster
Layer
Fill with the
Foregroundcolor
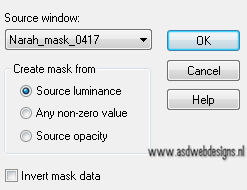
Layers - New Mask Layer - From Image
-
Narah_mask_0417
Layers - Merge - Merge Group
Layers - Load/Save Mask - Load Mask
from Disk - 20-20
Layers - Merge - Merge Group
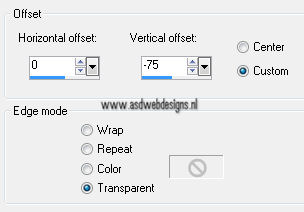
Effects - Image
Effects - Offset
Effects 3D Effects - DropShadow -
Color: #000000
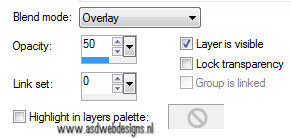
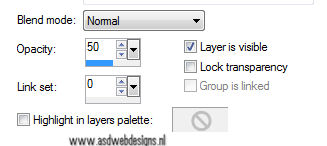
Layer Palette - Double
click on this Layer and set the Blend Mode to "Overlay" and the Layer
Opacity to 50
16.
Layer Palette - Click on the second layer from the
bottom
Open Tube "Msb_Deco_3"
Edit - Copy
On
your work image: Edit - Paste As New
Layer
Effects - Image
Effects - Offset
Effects 3D Effects - DropShadow
- Color: #000000
Selections - Select All
Selections - Float
Selections - Defloat
Effects - Illuminations Effects - Sunburst -
Color #ffffff
Layer Palette - Double click on this
Layer and set the Layer
Opacity of this layer to
50
Selections -
Select None
17.
Open Tube "Msb_Deco_4"
Edit - Copy
On
your work image: Edit - Paste As New
Layer
Effects - Image
Effects - Offset
Effects 3D Effects - DropShadow
- Color: #000000
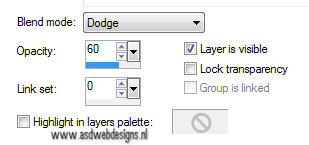
Layer Palette - Double click on this Layer and
set the Blend Mode to "Dodge" and the
Layer Opacity to 57
18.
Layer Palette - Click on the top
layer
Go back to Tube "Alies 1CH454-tough-28042013"
Edit - Copy
On
your work image: Edit - Paste As New
Layer
Image - Resize - 75% - Resize all
layers not checked
Effects - Image
Effects - Offset
Adjust -
Sharpness - Sharpen
Effects - Plugins -
Alien Skin Eye Candy 5 - Impact -
Perspective Shadow -
Settings Tab:
Msb_Preset_AS_PS_Magnifico_01
Effects 3D Effects - DropShadow -
Color: #000000
19.
Go back to Tube
"Alies
1CH454-tough-28042013"
Layer Palette: Click on the bottom
layer
Edit - Copy
On
your work image: Edit - Paste As New
Layer
Image - Mirror
Image - Resize - 70% - Resize all
layers not checked
Effects - Image
Effects - Offset
Adjust -
Sharpness - Sharpen
Effects - Plugins -
Alien Skin Eye Candy 5 - Impact -
Perspective Shadow -
Settings Tab:
Msb_Preset_AS_PS_Magnifico_02
Effects 3D Effects - DropShadow
- Color: #000000
Layers -
Duplicate
Image -
Mirror
Image - Resize - 85% - Resize all
layers not checked
Effects - Image
Effects - Offset
Layers - Merge - Merge Down
20.
Layers - New Raster Layer
Add your name or
watermark
Layer Palette - Click on the Bottom layer
Effects - Plugins – Graphics
Plus – Cross
Shadow
Layers - Merge - Merge all (Flatten)
Edit -
Copy
21.
Layer Palette:
Set your Foregroundcolor to #2d323f

Your
Backgroundcolor is still on #f5f6f5

Image - Add Borders - Symmetric
checked - 1 px - Foregroundcolor
Image - Add Borders - Symmetric
checked - 2 px - Backgroundcolor
Image - Add Borders - Symmetric
checked - 1 px - Foregroundcolor
Selections -
Select All
Image - Add Borders - Symmetric
checked - 50 px - Backgroundcolor
Selections -
Invert
Edit - Paste into
Selection
(Image is still in your PSP memory)
Adjust - Blur - Gaussian Blur - 12
Keep selected
22.
Layers - New Raster Layer
Open Tube "Msb_Template_Magnifico_02"
Edit - Copy
On your work
image: Edit - Paste Into
Selection
Effects - Plugins – Graphics
Plus – Cross
Shadow
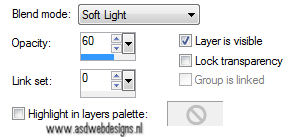
Layer Palette - Double click on this
Layer and set the Blend Mode to
"Soft Light"
Keep selected
23.
Layers - Merge - Merge all (Flatten)
Selections -
Invert
Effects 3D Effects - DropShadow
- Color: #000000
Selections - Select None
Image - Add Borders - Symmetric
checked - 1 px - Foregroundcolor
Image - Resize - Width 950 Pixels -
Resize all layers checked
Save as JPG file and you're done!